
I’ve owned three houses over the past eight years, and every single one of them has needed roof work at some point. The first time, I hired a contractor who quoted me $2,500 for what turned into a $6,000 disaster. The second time, I tried to patch a leak myself with caulk and a prayer—and ended up with water stains in my living room. By the third house, I had collected enough **roofing repair tips** to know what actually works and what’s a waste of money. So I’m going to share them here, plain and simple, no contractor’s sales pitch attached.
Start with a Walkaround Inspection
Before you call anyone or buy anything, grab a pair of binoculars and walk around your house on a sunny day. Look for missing shingles, curled edges, or dark spots that could indicate moisture. Check the flashing around your chimney, vents, and skylights—that’s where most leaks start. I once spent $400 on a roofer to tell me the leak was just a loose boot around a vent pipe. A 10-minute look from the ground would have saved me that money. This is the cheapest of all roofing repair tips: know what you’re dealing with before you open your wallet.

Know When to DIY vs. Call a Pro
I’m a big fan of DIY, but roofing is one area where the line is thin. If you have a single missing shingle or a small nail pop, you can handle it with a tube of roofing cement and a putty knife. But if you’re dealing with widespread damage, a sagging deck, or anything near electrical or chimney flashing, call a licensed roofer. I tried to replace a few shingles myself once and accidentally stepped on a weak spot, putting a hole through the deck. That repair cost me $1,200. Another of my roofing repair tips is to price out materials first—sometimes the DIY savings aren’t worth the risk.
Don’t Skimp on Underlayment
When you do hire a pro, or if you’re doing a full tear-off, don’t let them talk you into skipping the underlayment. I’ve seen contractors try to save money by using cheap felt paper or skipping it entirely. A good synthetic underlayment adds maybe $200 to a typical roof but can prevent leaks for decades. My last roof job used a synthetic underlayment with a 30-year warranty, and it’s already paid off during two heavy Ohio storms. If you remember only one of these roofing repair tips, make it this: the layer under the shingles is what really protects your house.
Watch Out for Contractor Red Flags
I’ve been burned, so now I spot red flags early. If a roofer asks for more than 10% down before starting, walk away. If they don’t have local references or a physical address, walk faster. I once had a guy give me a quote over the phone without even looking at my roof—that should have been my first clue. Another common scam is the “we found extra damage” upcharge. Get everything in writing, including what happens if they uncover rot or old leaks. These roofing repair tips are about protecting your bank account, not just your shingles.

Temporary Fixes That Actually Work
Sometimes you need a quick patch to get through a storm or until you can save up for a real repair. For small leaks, a tarp secured with 2x4s and sandbags can hold for weeks. For a cracked flashing joint, use a waterproof sealant like Henry’s 208 Wet Patch—it’s about $15 a gallon and works miracles. I’ve also used a piece of aluminum flashing and roofing nails to cover a small hole. These temporary roofing repair tips aren’t permanent solutions, but they’ll keep your drywall from turning into a sponge while you plan the real fix.
What I Wish I’d Known Before My First Roof Repair
Looking back, I wish someone had told me that most roof repairs are less about the shingles and more about the flashing and seals. I also wish I’d known that a good roofer will warranty both materials and labor for at least five years. And I wish I’d known to check my homeowner’s insurance policy—some policies cover storm damage but not wear and tear. Filing a claim might be worth it if the damage exceeds your deductible. These are the roofing repair tips that come from regret, and I hope they save you a headache.
The Tool Kit Every DIYer Needs for Minor Roofing Repair Tips
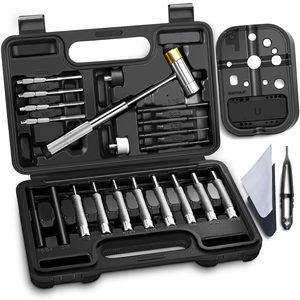
If you’re planning to handle small repairs yourself, having the right tools makes all the difference. Start with a sturdy ladder that extends at least three feet past the roof edge—never lean it against gutters. You’ll need a flat pry bar for removing shingles, a hammer or nail gun for fastening, and a utility knife with plenty of blades. For sealing, keep a tube of roofing cement and a caulk gun handy. A magnetic sweeper is smart for picking up dropped nails that could puncture tires or hurt bare feet. I also recommend a pair of roofing gloves with rubber grips; they save your hands and help you keep your footing. These roofing repair tips for your tool kit will cost under $100 if you already have a ladder, and they’ll let you tackle about 80% of the small jobs that come up. Just remember: only work on a cool, dry day—hot shingles are slippery and soft, making them easy to damage.
— Sam, an ordinary homeowner still struggling with the house



No letters yet — pray write the first.