One random Saturday I was scrolling Facebook Marketplace while drinking coffee when I saw it — a big, dark oak cabinet listed for $50. The photos were terrible. It looked dirty, scratched, and half-abandoned in someone’s garage. Most people would scroll past.
I drove over anyway. When I saw it in person, it was even rougher than the pictures. The finish was almost black with age and neglect, there were water stains on top, one door was warped, and half the hardware was missing. But the bones were solid — real oak, dovetail joints, and heavy as hell.
I handed the guy $50 and brought it home in the truck. Wendy took one look and said, “You’re really going to fix that thing?” I told her I’d try.
That $50 cabinet ended up becoming one of my favorite pieces in the entire house.
Why I even bother with old furniture
I’m not a professional woodworker. I don’t restore antiques for a living. But after three houses and too many trips to IKEA, I realized that solid wood furniture from 30–50 years ago is often better built than a lot of new stuff. The price on Marketplace or garage sales makes it worth the effort.
The restoration process step by step

Step 1: Assessment and disassembly
I took the whole thing apart as much as possible — doors, shelves, hardware. This lets me clean and sand every surface properly. I took photos of how everything went together.
Step 2: Deep cleaning
Before any sanding, I cleaned it thoroughly with TSP substitute and then mineral spirits. Years of dirt and grease came off. This step makes sanding much easier.
Step 3: Sanding
This is the biggest job. I started with 80 grit to remove the old finish and scratches, then moved to 120, 180, and finally 220. The oak grain started to wake up beautifully once the old crud was gone.
Step 4: Repairs
The warped door needed some persuasion with clamps and moisture. I filled a few deep gouges with wood filler, replaced missing hardware with period-appropriate pulls I found on Amazon for cheap, and fixed one loose joint with wood glue and dowels.
Step 5: Finishing
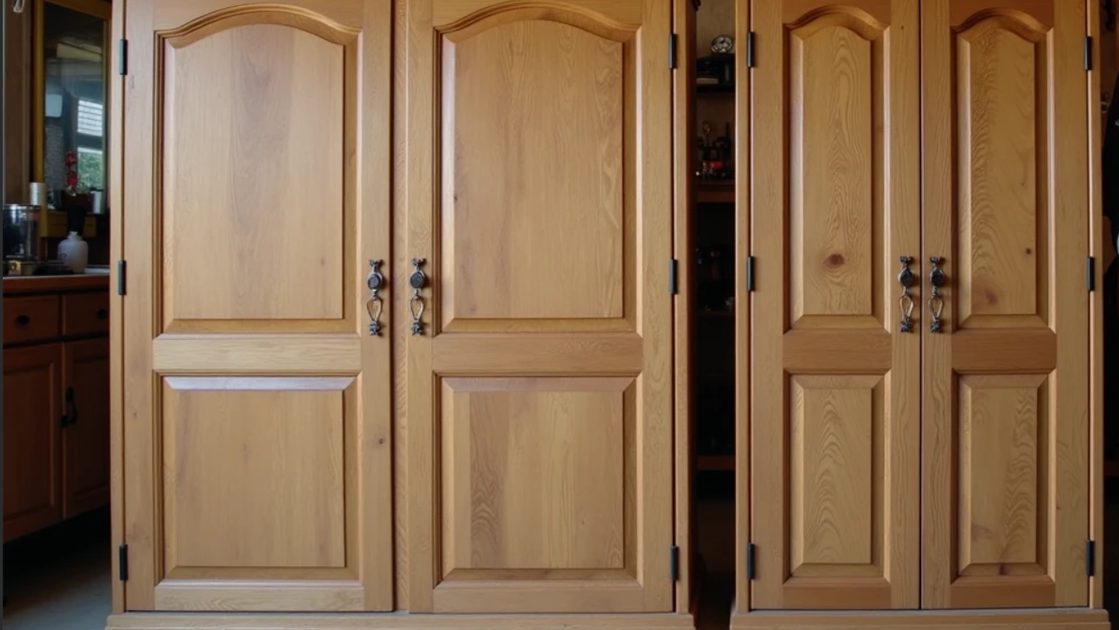
I applied two coats of pre-stain conditioner, then a rich walnut stain to bring out the grain. Finally, three coats of water-based polyurethane in satin. The transformation was dramatic.
The result
When it was done, Wendy actually gasped. The cabinet now sits in our dining area and holds board games, kids’ art supplies, and some nice glassware. It looks like something we could have paid $800+ for at a furniture store. Guests regularly compliment it.
What I’ve learned from doing several flips
Solid wood is king
If it’s real wood (especially oak, maple, or walnut), it’s usually worth the effort. Particle board or veneer? I usually walk away.
Look past the ugly finish
The worst-looking pieces often have the best bones. People give up because of surface issues that are fixable.
Tools that make flipping easier
Orbital sander (huge time saver)
Good palm sander for details
Quality wood filler
Clamps (you can never have too many)
Mineral spirits and decent brushes
When to walk away
Not every cheap find is worth it. I’ve learned to check for:
Major structural damage (sagging shelves, broken joints)
Water damage that warped the wood badly
Termite or insect damage
Veneer that’s peeling everywhere
Other successful flips I’ve done
A mid-century side table for $25 that now sits next to our couch
An old wooden toolbox that I turned into a planter for the backyard
A set of dining chairs that just needed new upholstery and cleaning
Each one cost under $100 total and looks better than most new furniture in the same category.

The kids get involved too
My 9-year-old helped sand the lower parts of the cabinet. My 5-year-old “supervised” and handed me sandpaper. They both love pointing out “the cabinet Daddy saved” when people visit. It’s become a good lesson in patience and turning something old into something useful again.
Cost breakdown for this cabinet
Purchase: $50
Sandpaper and supplies: $18
Stain and poly: $32
New hardware: $24
Total: ~$124
Compare that to a similar new cabinet at $600–$900. The time investment was one full weekend plus a few evenings.
Why this hobby fits our life
It’s satisfying, saves money, and keeps me from buying more disposable furniture. Plus, every time I look at that cabinet I remember the journey from ugly duckling to family favorite.
Wendy has gotten more on board too. She now helps pick pieces and decides where they’ll go in the house. Her design eye plus my hands-on work makes a good team.
Advice for anyone wanting to try Marketplace flips
Start small. Pick something simple like a side table or small cabinet. Take your time on the sanding — that’s what makes the difference. Don’t be afraid to experiment with stain colors. And most importantly, only bring home pieces you actually have space and plan for.
Not everything will turn out perfectly, but even the ones that are just “okay” still feel like wins compared to cheap new furniture that falls apart in two years.
This $50 cabinet taught me more about furniture than any store visit ever did. It’s now one of the most complimented pieces we own.
I’ve already made the mistakes (and had the splinters) for you.
The money saved is enough to buy a case of beer. Or in this case, fund the next Marketplace treasure hunt.
Don’t worry, it’s not expensive to give old furniture a second life.


No letters yet — pray write the first.